
A Guide to Hot Water Schedules.
We've all got an Air Source Heat Pump, but do you really need to be heating your water up all day, every day? Dom, one of our residents at The Grove, shares how you can set up a hot water schedule and potentially save yourself a lot of money...
Did you know that our Air Source Heat Pump, actually has nothing to do with our hot water?! Yes - the ASHP actually only manages our homes central heating or underfloor heating systems. They don't actually heat the hot water that we draw from the taps or showers.
This hot water actually comes from the tank we have indoors using emersion heaters that use electricity to charge the water to the temperature we need.
Unfortunately, this can be quite costly and depends on the energy tariff that you are on, but generally speaking, most energy tariffs are more costly at peak times of the day, such as day time hours. Whereas some other tariffs may have cheaper periods such as overnight. It is wirth checking what tariff you are on to see if you have a cheaper rate of electricity as this is where you can set a schedule and then same some money.
One provider to consider is Octopus Energy as they have a number of tariffs that are best suited for homes with ASHPs or homes with EV chargers... hoorah, we have both!!
Now bearing in mind, your ASHP and tank are separate, so if you did choose to go onto a tariff that has two rates, you can still make best use of the cheaper of those rates by setting your other high consuming devices in the home to come on during these cheaper periods. One of which could be our hot water tanks.
So lets get into it and show you how you can set up a schedule on your water tank...
Getting logged in...
You'll first need to access some additional options by logging in as an admin user.
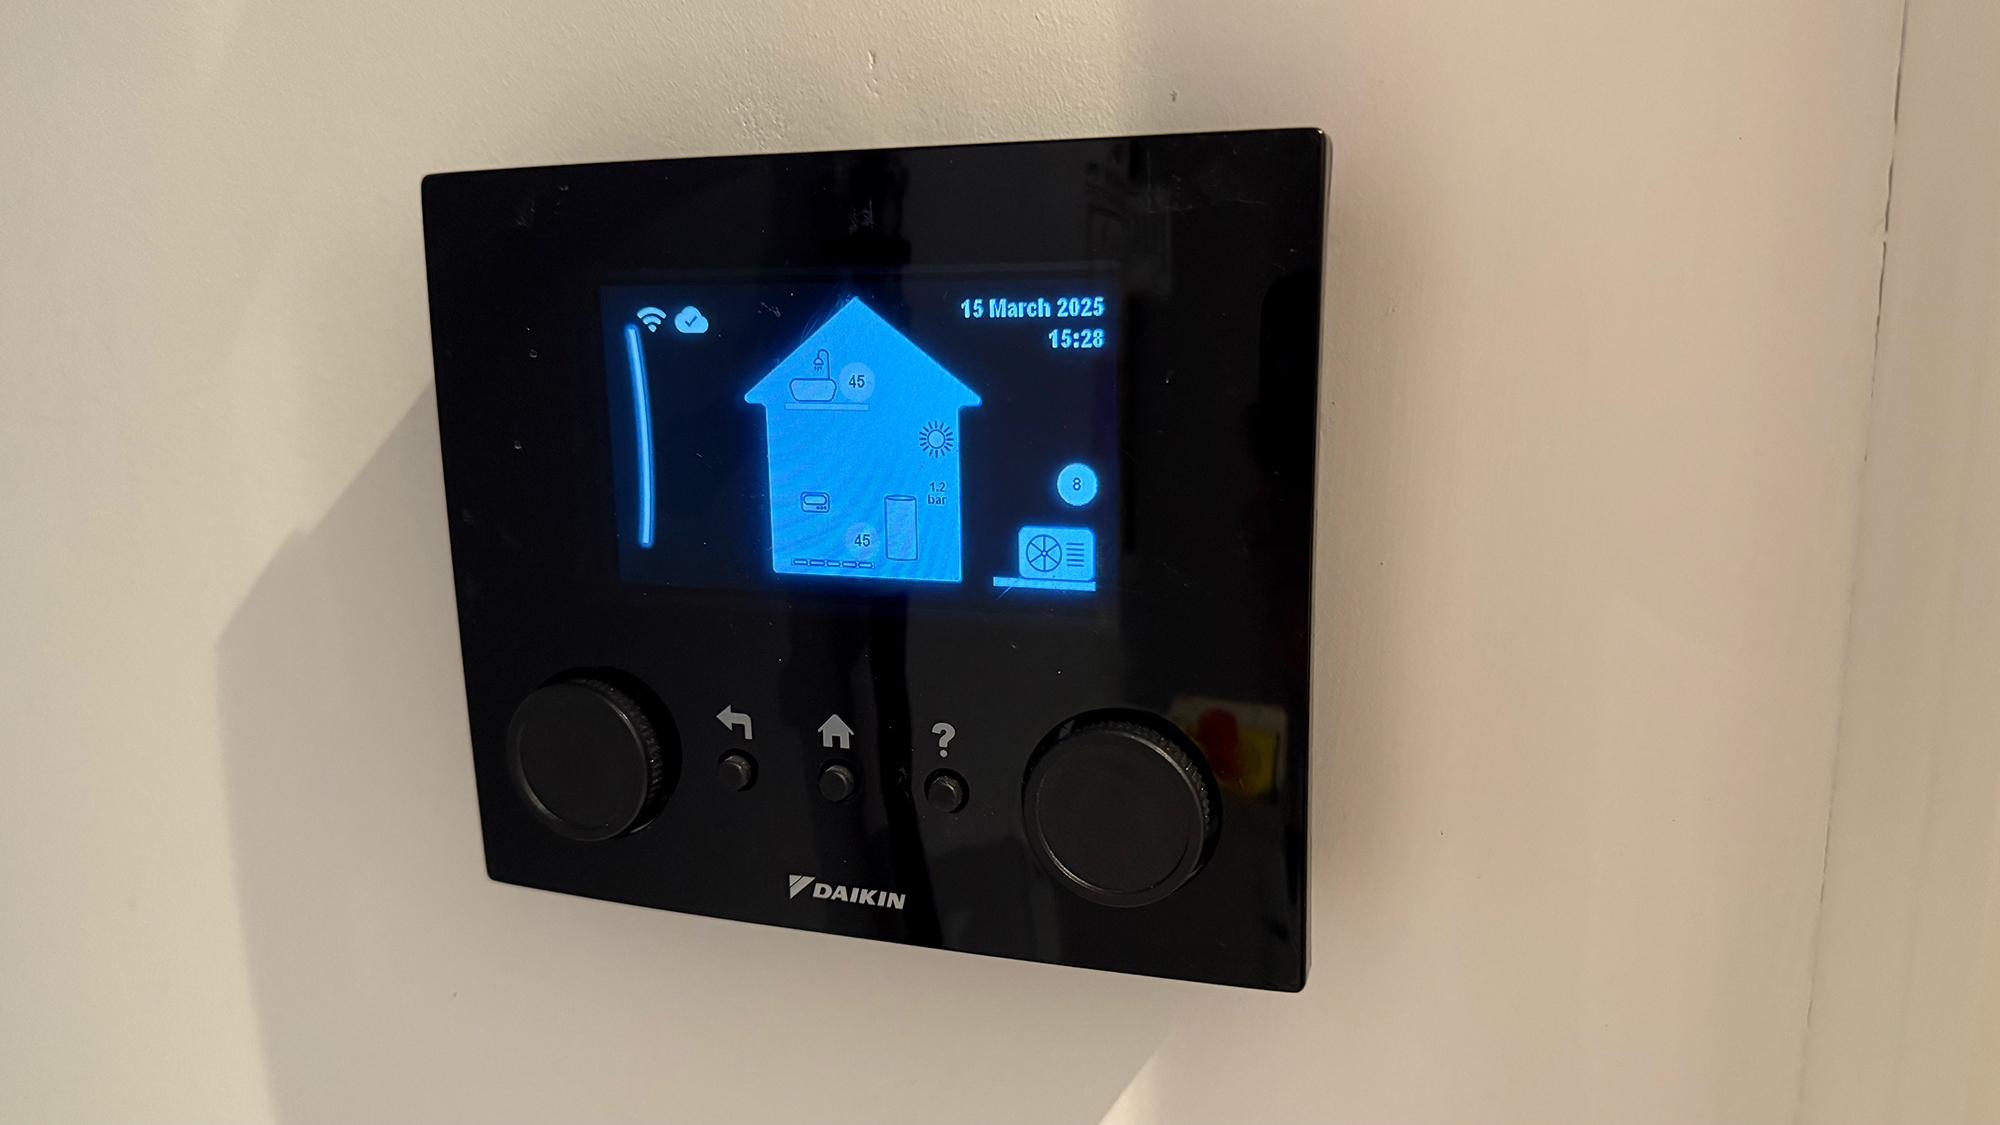
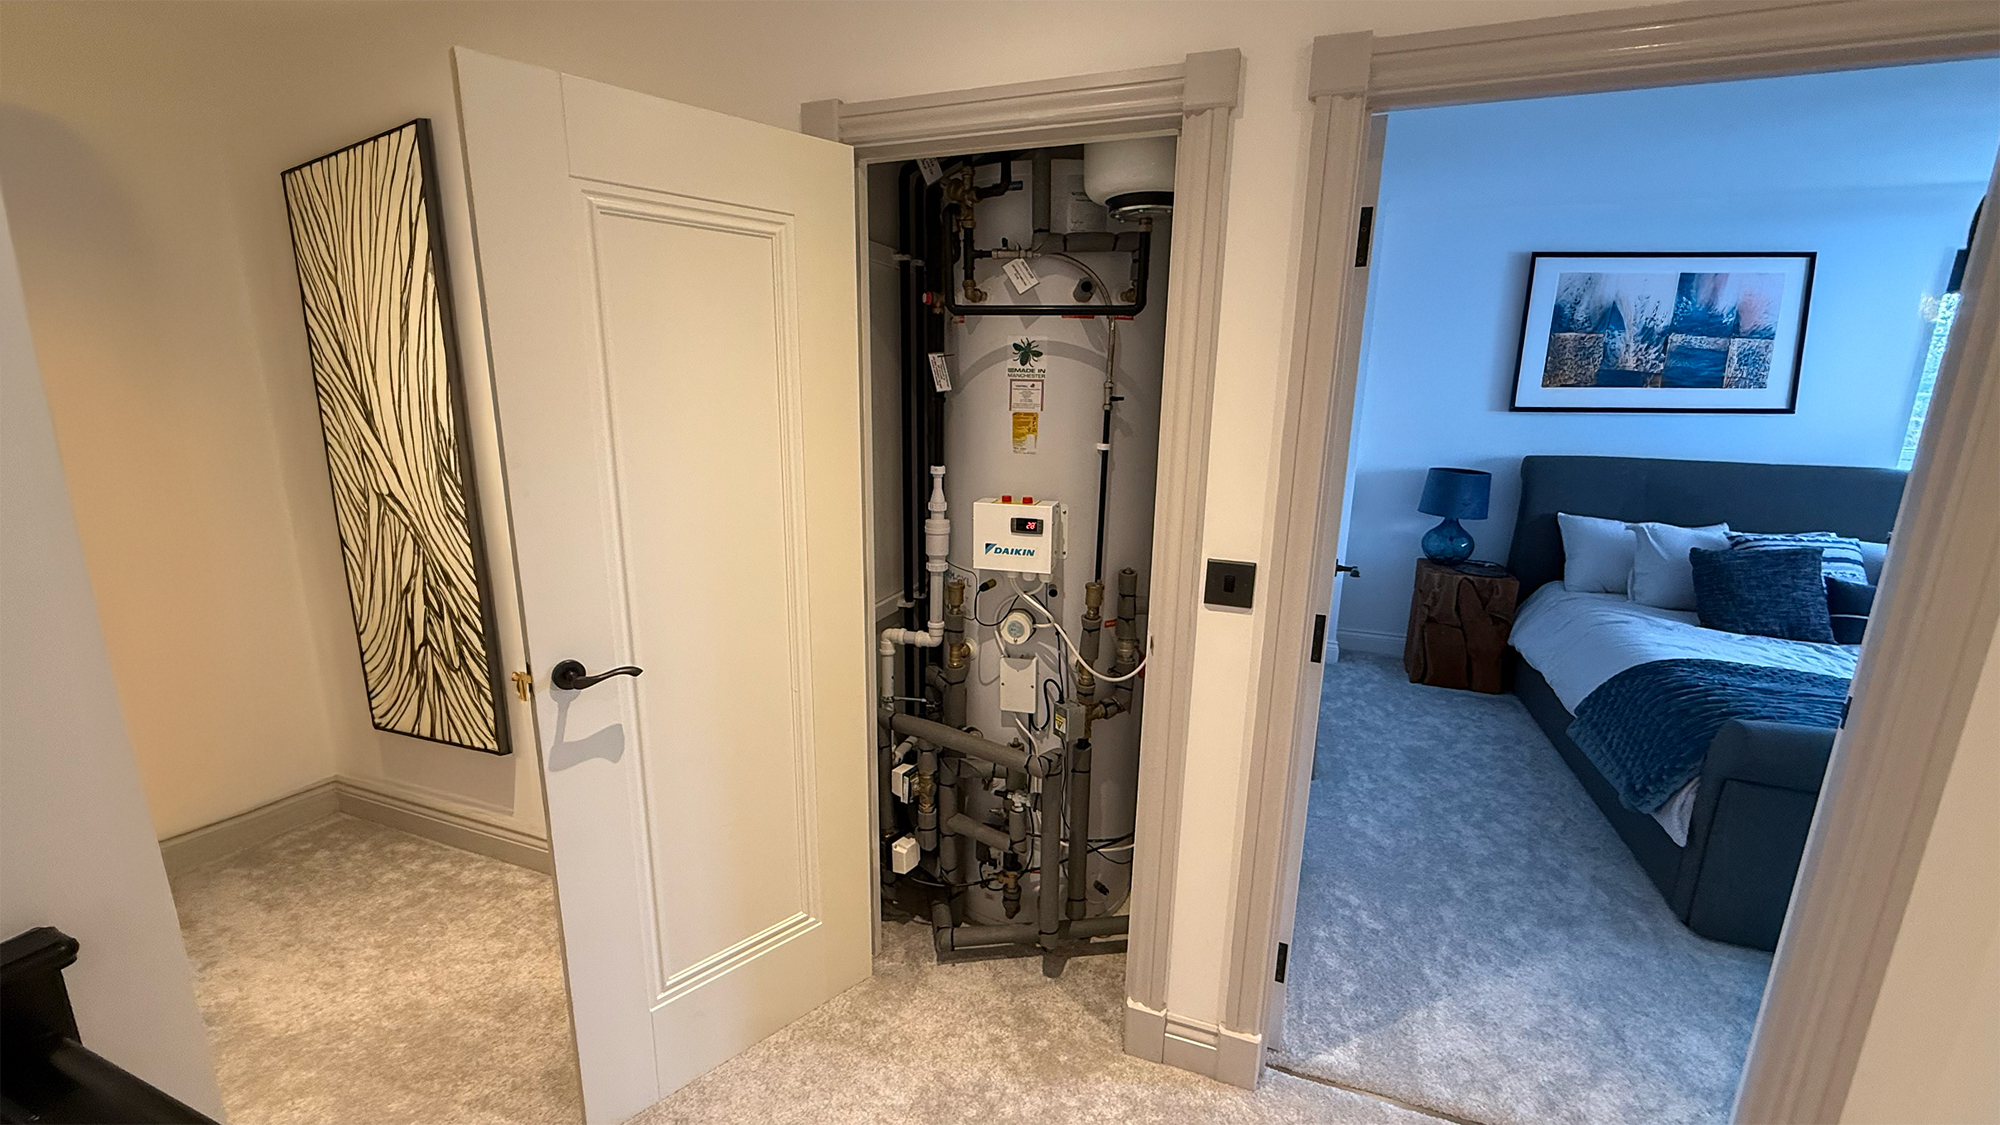
In your tank cupboard you should have a DAIKIN Atherma MMI control panel which looks like the one in the above photo. If there is nothing on the screen, just press the home button to wake it up.
Now press the left dial to bring up the menu and, using the left dial, turn the dial until you get to User Profile in the menu and click the left dial to select it.
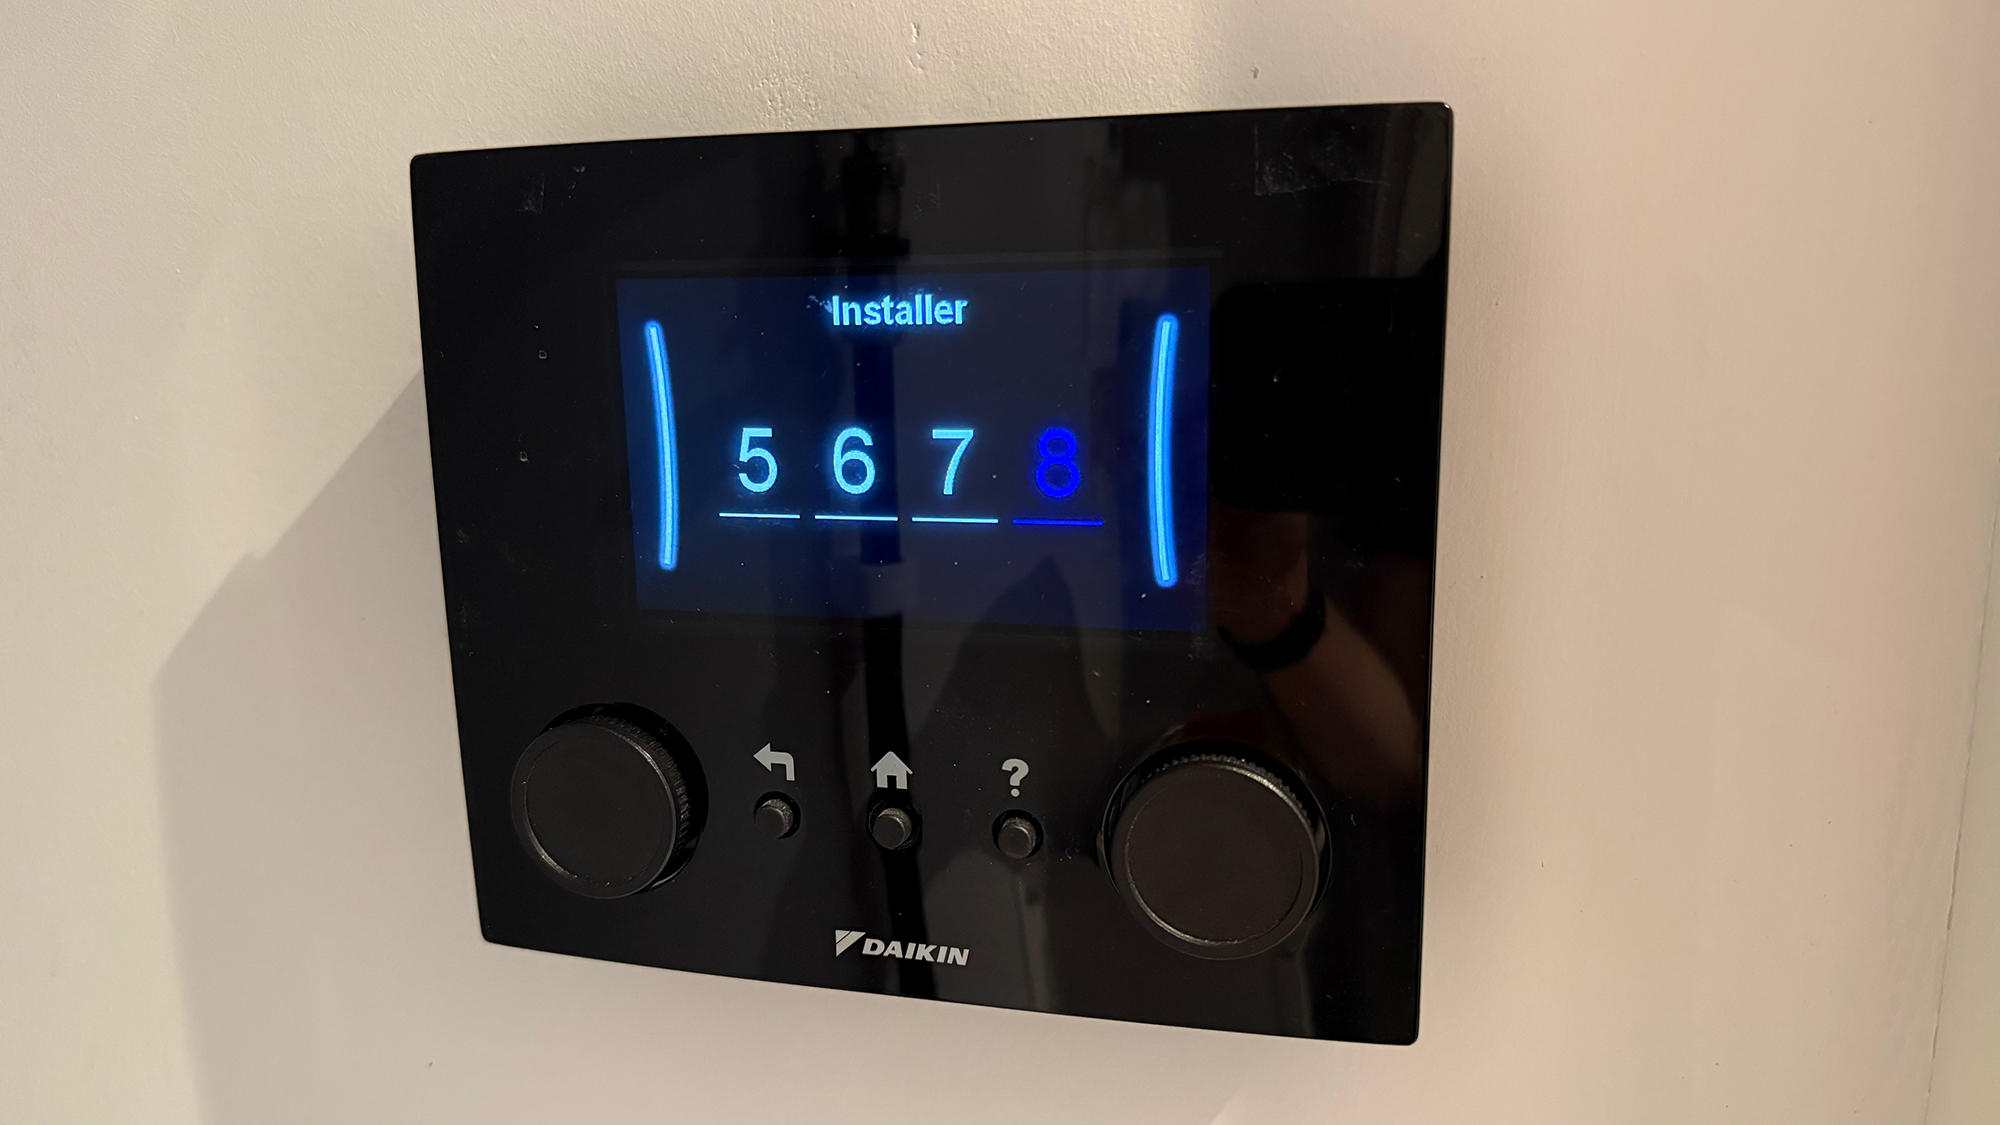
This should come up with a 4-digit password screen. Using the right hand dial, turn and click it to enter the passcode 5-6-7-8 and then click the dial one more time. You should see the word INSTALLER appear above the passcode.
By putting in this code, we have given ourselves a few more menu options to choose from in the main menu, but it has also unlocked the ability for us to set up a schedule in the system. Click on the home button to get back to the home screen and we will go from there again.
Setting the Setpoints...
In this next step, we will set the temperatures we want our system to operate at...
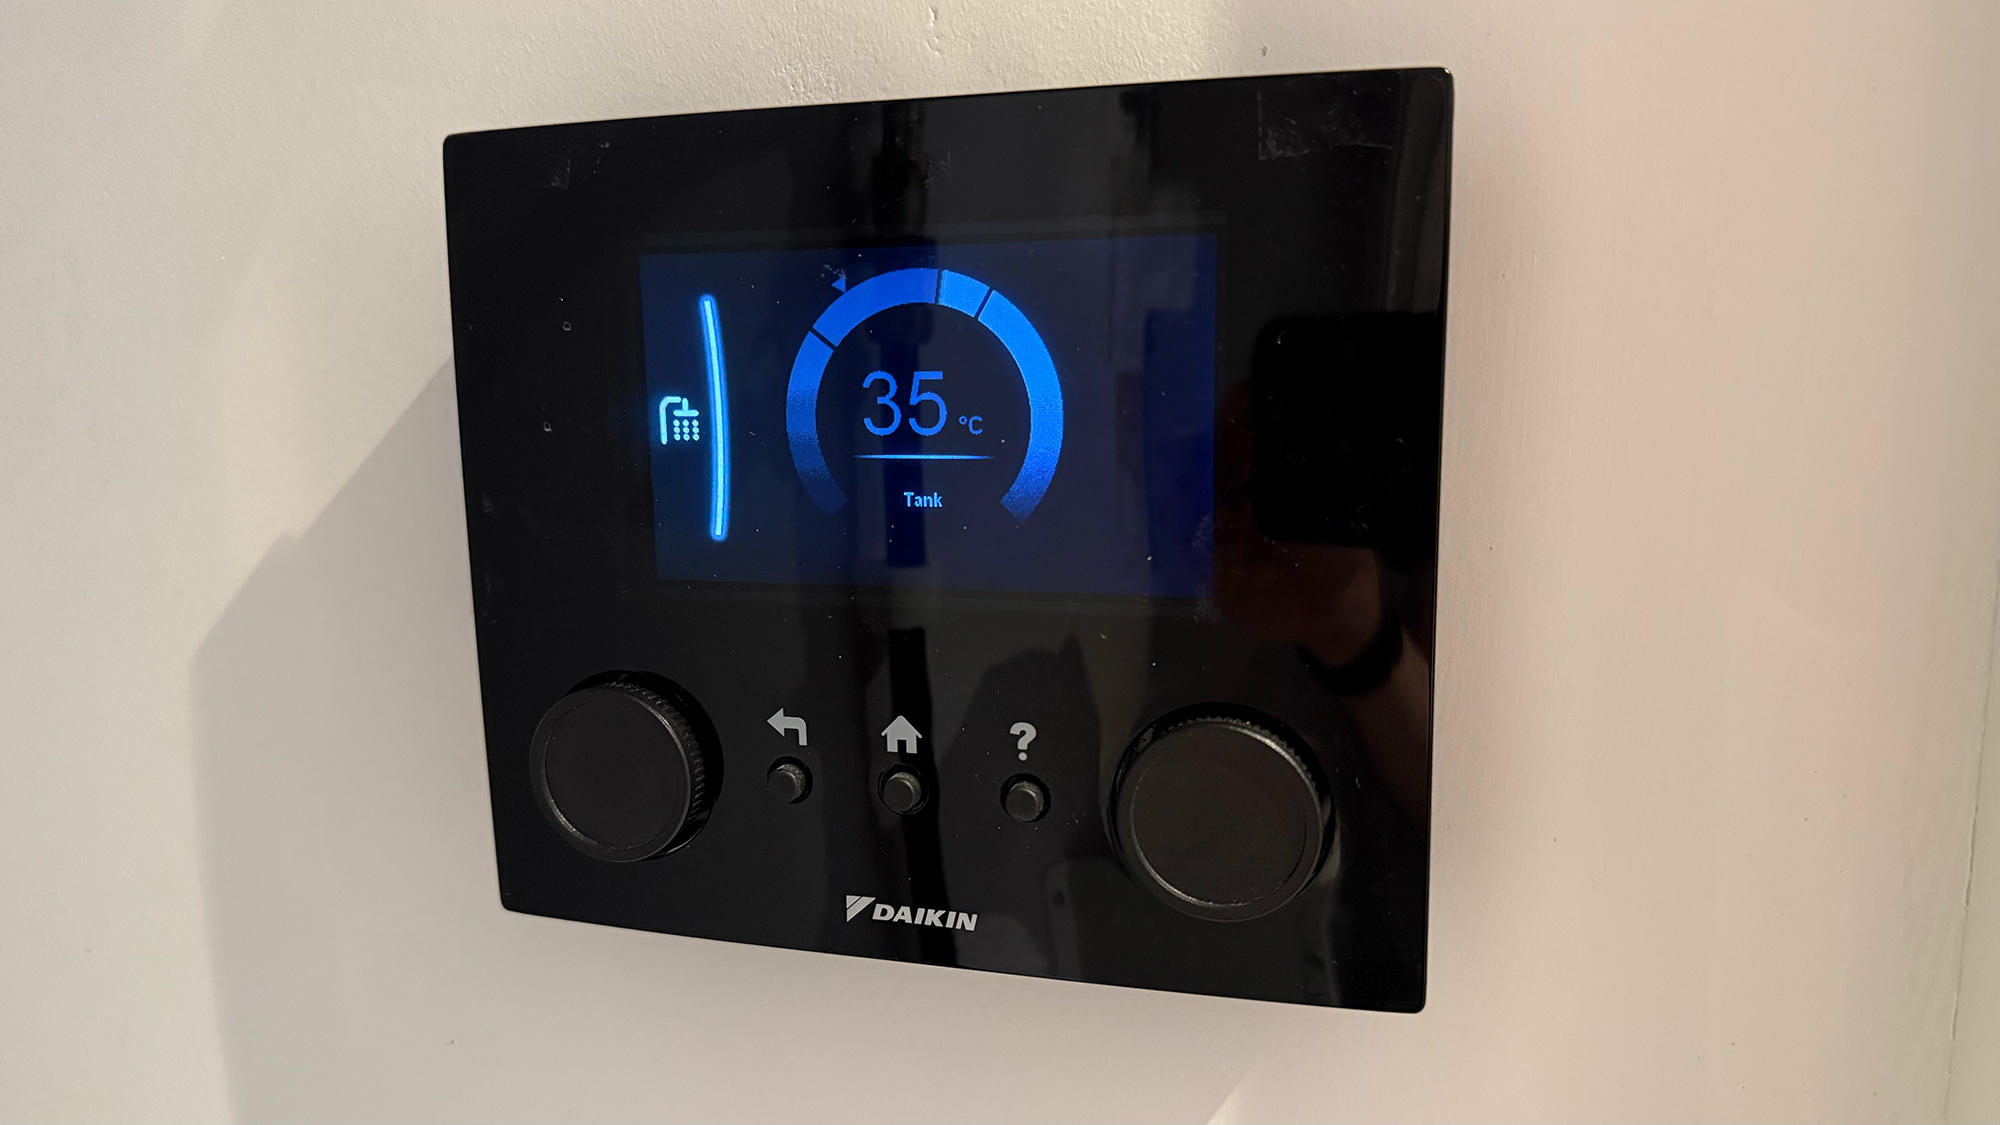
Click on the left dial to bring up the main menu and this time scroll through the options until you get to Tank. Click the left dial to select it. This time you should see a guage with a temperature on the screen. Click on the left dial again to bring up the menu again.
We are now getting to the part where we need to potentially alter a few settings. You will notice that you have two different setpoint options. One is called a Comfort Setpoint and the other is the Eco Setpoint. The Comfort Setpoint is the higher of the two and the Eco Setpoint is the lower one. The idea will be, that over the cheaper rate of energy, we will charge the water up to the Comfort Setpoint, lets say 50 degrees celcius, and then over the day we will use water and it may drop in temperature, however if it was to hit the lower Eco Setpoint marker, say 35 degrees, then the system would only use a small amount of energy at peak times to hold it at that Eco temperature and it will wait until the cheaper time of the day to charge the water back to the Comfort Setpoint.
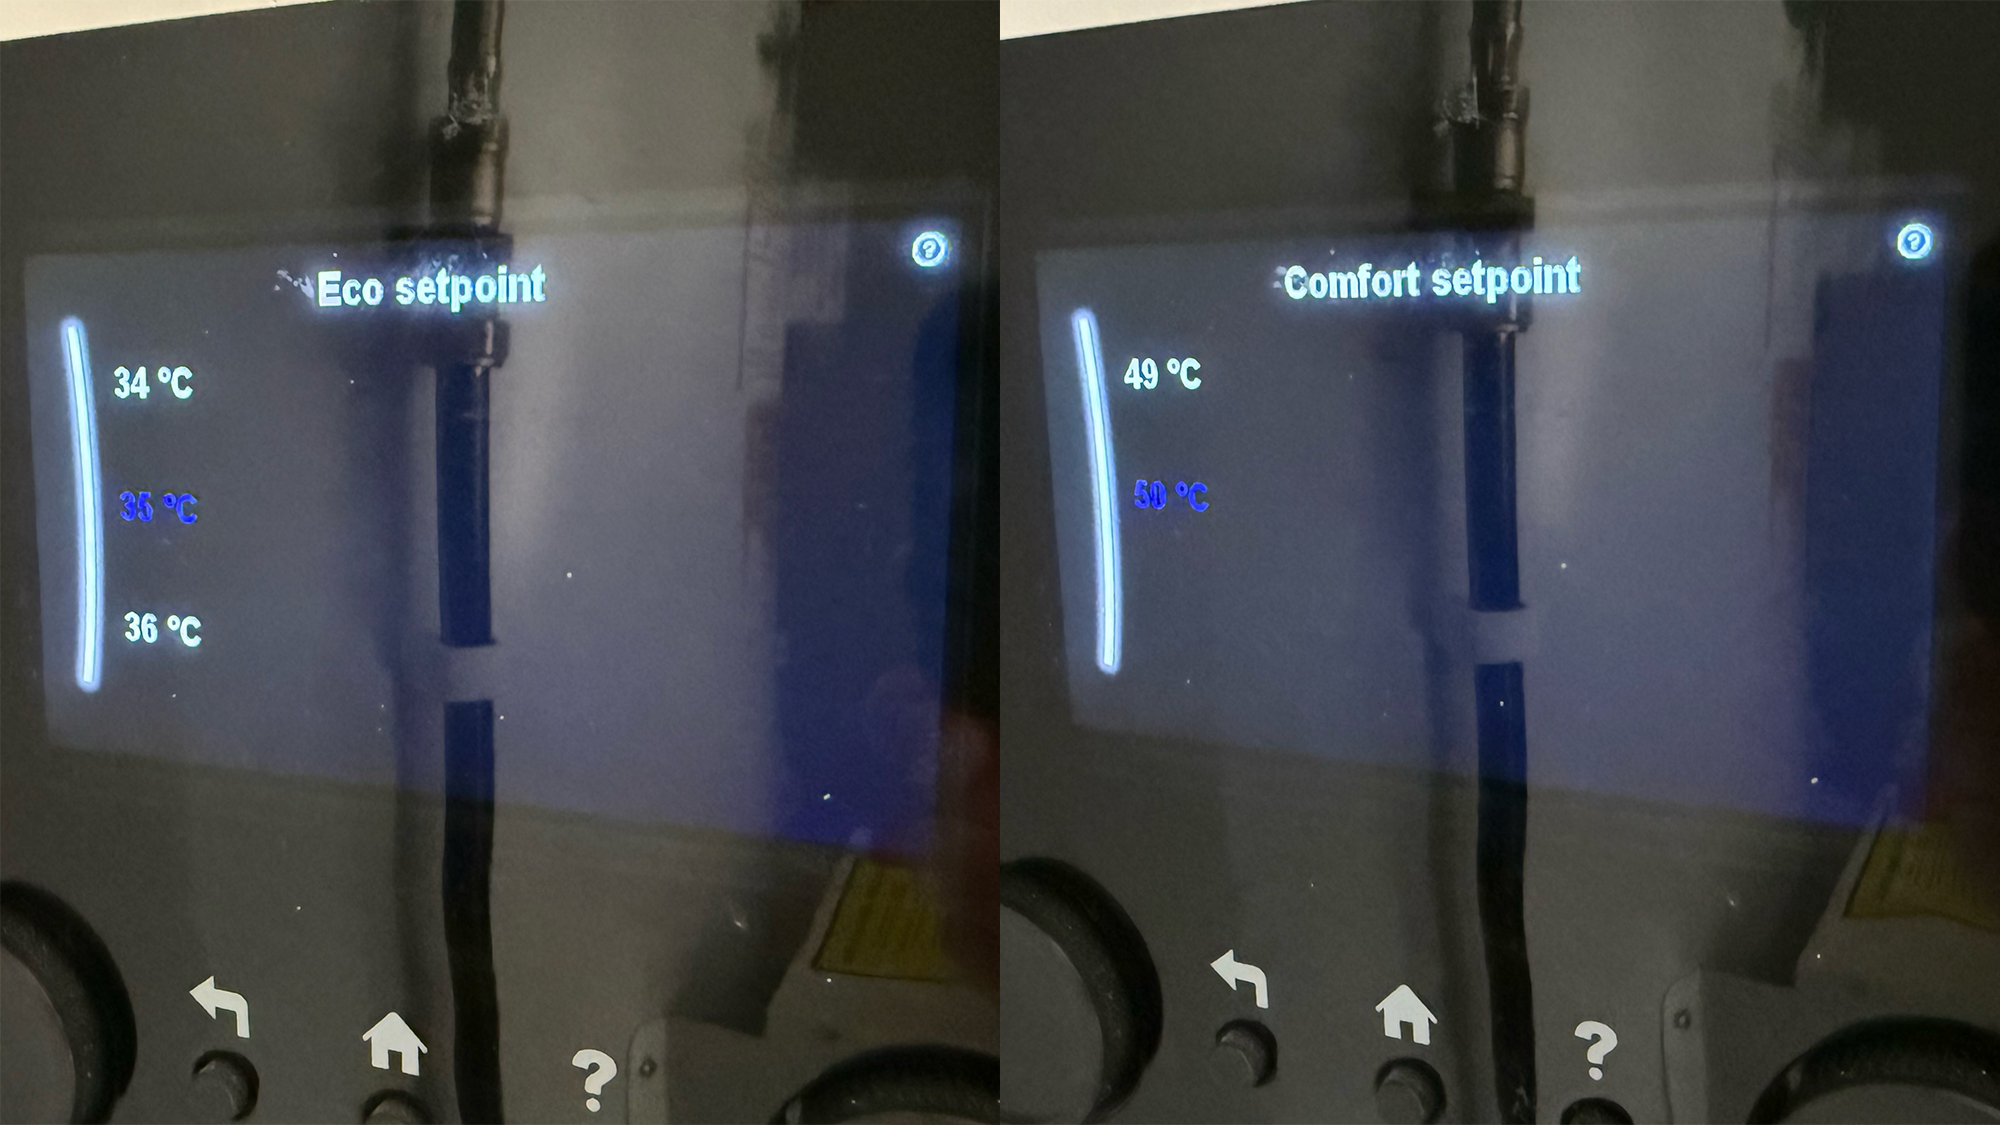
So, to set this up, click on the left dial to select the Comfort Setpoint and then turn the left dial to set the temperature you want to charge the water to - lets go for the highest we can and set it to 50 degrees. Once you have set this, click the left dial to save the setting and then click the back arrow to go back to the menu.
I would recommend having your Comfort Setpoint as high as you can set it, which is 50 degrees celcius. You can then follow the same process to set your Eco Setpoint. This should be set lower, say at 35 to 40 degrees. If you have ever been in a jacuzzi or hot tub, then the average temperature of these is usually 35 to 40 degrees, so more than warm enough for a shower, but its entirely up to you. Just don't set it too low.
Creating the schedule...
Now that we have our setpoints set up, we can move on to creating the schedule. This can get a bit fiddly between the left and right dials, but don't panic, you can easily start over and you will soon get the hang of it.
If you find yourself back at the home screen, click on the left dial and go back to Tank. Click on the left dial again to bring up the menu and this time select Schedule.
You will see the schedule on screen with Monday to Sunday shows as bars on the screen. Initially, these will all be white, as you haven't yet set any times up for when the system will come on to charge the water up to the higher Comfort Setpoint.
So, lets get started... click on the left dial to bring up the menu and turn the dial to select Edit and then click the left dial to select it. You will see that you now have a single bar along the top of the screen and a Time and Mode setting below. Using the right hand dial, turn the dial to set the start time that you would like to start charging the water up to the Comfort Setpoint. Lets assume that you have a tariff with a cheaper rate of energy between 11:30pm and 5:30am and you want the water to come on for three hours over night from 1am to 4am. So on the first time option, turn the dial until you get to 01:00, then click the right hand dial to lock that in. This should move you over to the Mode setting, using the right hand dial, turn it until Comfort is selected. You should see everything right of your marker on the bar, turn blue. Click the dial to lock that in. You should now have another set of time and mode settings appear below the ones you have just created. Using the same method, turn the dial to select 04:00 and lock that time in and then under mode, turn the dial to select Eco. The bar should now turn white again showing the end of the scheduled duration.
You may have noticed that there is also a mode setting called OFF. This will do as it says on the tin, and turn the system off completely, meaning if the water in the tank was to drop below the Eco setpoint, it would keep dropping as we have not told the system to maintain the temperature at the Eco temperature. If you did this, you might find that you have much colder water come the evening. Bear in mind, that charging the water back up from a much lower temperature, would also cost more, hence why we should only allow the water to drop to the Eco setpoint.
So, we have set the schedule for Monday, now we need to do the same for the rest of the week. To simplify things, you can use the copy and paste feature. To do this, select Monday and click on the left dial again. This time, instead of selecting Edit, select Copy.
Now go back and select Tuesday. Here you will see you have an option to paste, so select that and click the dial. You can work your way through the rest of the days of the week and paste the same across each day.
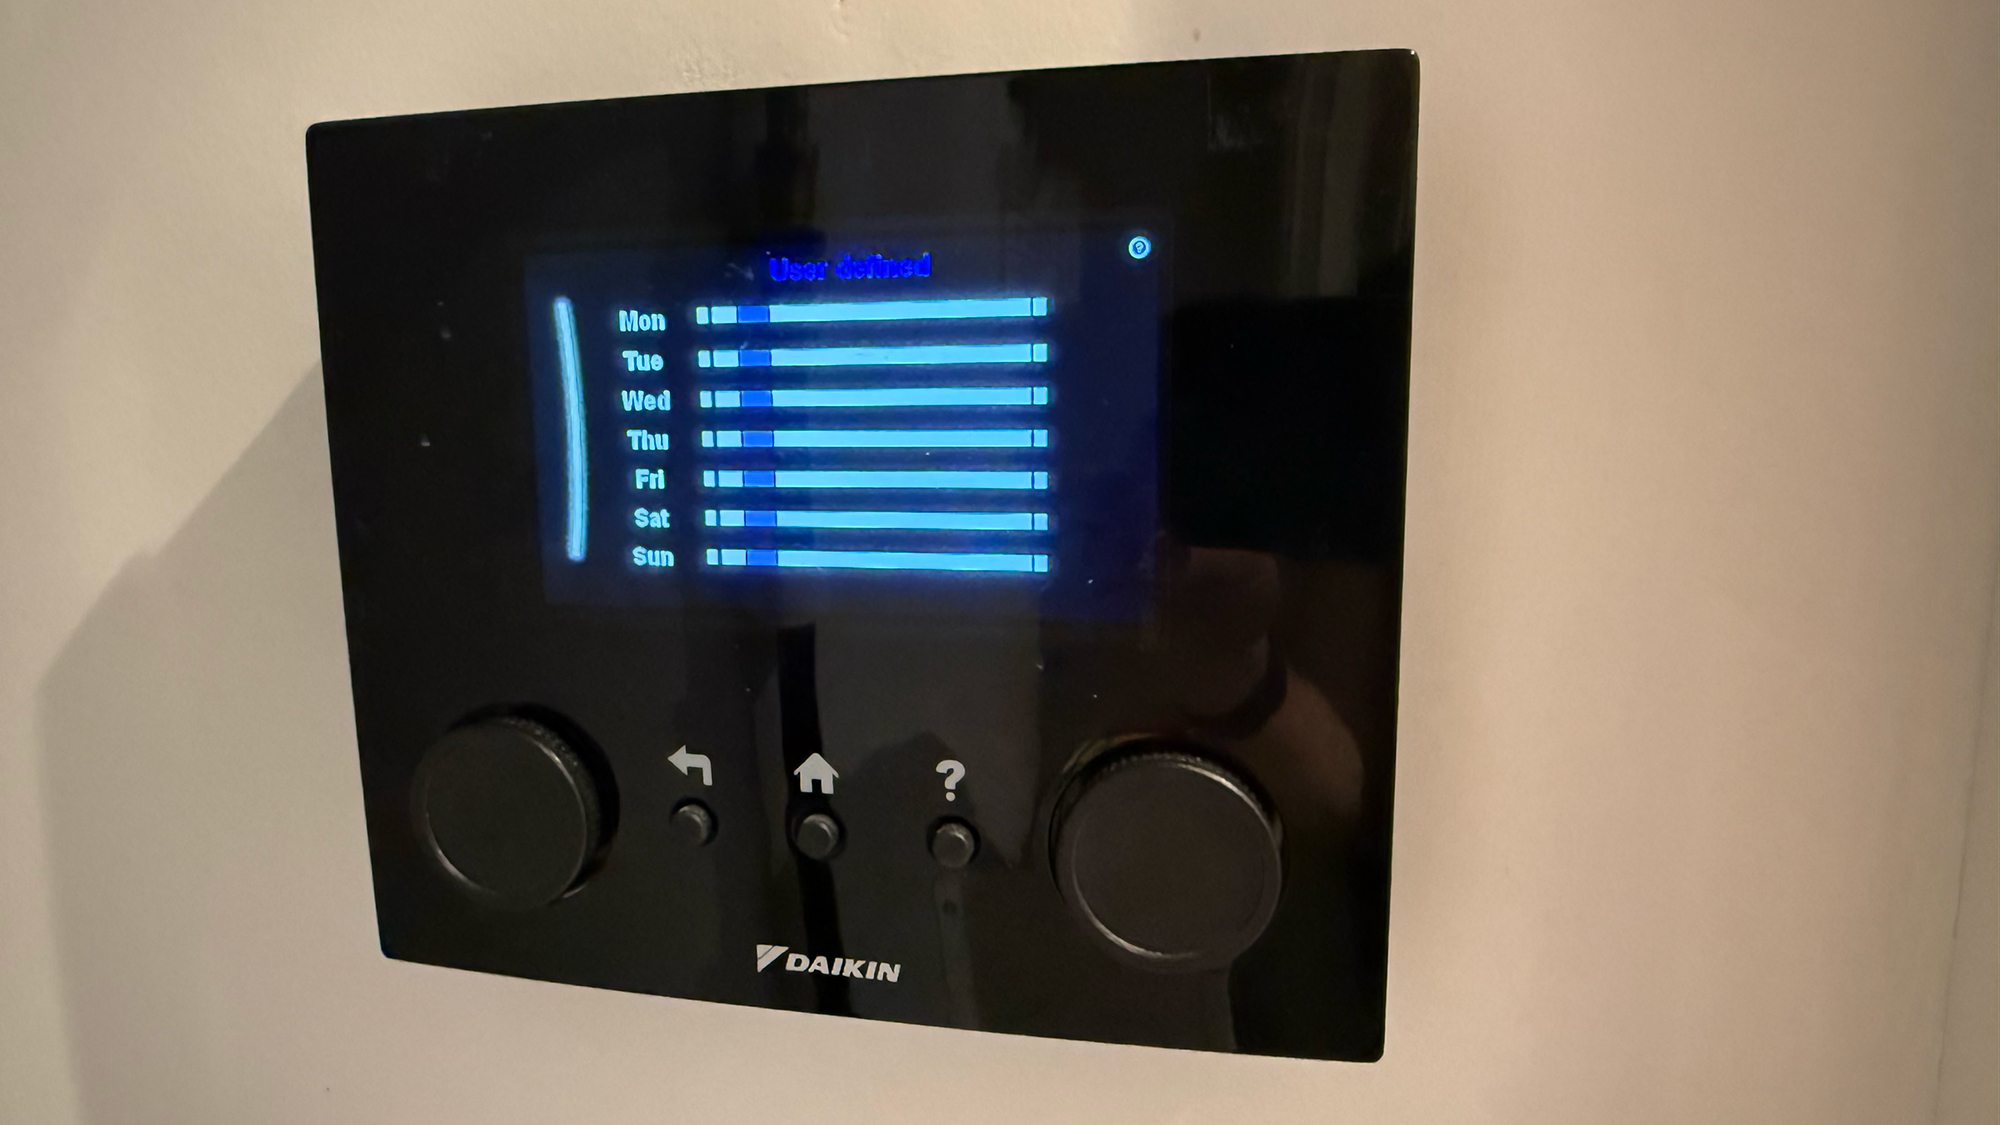
You should now have a schedule that looks like the photo above.